

I love my Epson 4900 printer when it works. The colors are wonderful, and I use the orange and green inks a great deal. But this printer also drives me crazy at times. It is a desktop printer (assuming you have a big and sturdy desk) as it does not come with a stand. The 17" roll paper feeder and the thick paper feeding system work wonderfully, as does the paper cassette for smaller prints. But as anyone who owns a x900 series printer knows, it comes with its headaches, mainly clogs. I think they should not be called clogs but rather clots, as when you get one, it feels like you are having a stroke. You try to overcome it, but it takes a lot of effort and work to overcome it.
I went about a year and a half without any major clogs. A quick nozzle check and cleaning would normally do the trick. As is often stated, this a a professional printer, and it needs work. You need to print regularly, and I have gone several weeks without printing, and it can be a headache.
Then in February, 2014, a major clog appeared, dropping most of the channels. I searched the internet, and was too scared to try any of the home brew items such as Windex and the like, and tried using moisture, cleaning the capping station, and multiple regular cleaning cycles. I poured a great deal of ink into several maintenance tanks, but got it working. One of the suggestions was to get a humidifier, as my printer is on a table in my basement with baseboard heat in the room. I also got a thermometer with a humidity gauge on it, and tracked the humidity in the room. In the winter it was about 10%, and Epson recommends between 40 to 50% humidity.
This time it was March. I just got back from photo workshop, so I had not printed for a couple of weeks. My printing stated fine, maybe a few dropped lines in the nozzle check, but no apparent banding or lines. Then the green blobs hit. It looked like an alien invaded my landscapes. The green is used for the deep blacks, and my black print nozzle was completely 100% clogged.
I tried my prior gentle process, clean the capping station, wiper blade, even the bottom of the head with distilled water. No change. Then I looked for solutions. Enter, the Ink Jet Mall. Most people with Epson printers know this site. Inks and refillable cartridges for Epson printers. I got a cartridge once for a failed Epson cartridge that was almost full, and it let me use the ink rather than throw it away. The site has a robust help site, and you can find many entries for the 4900. Here is the shopping page, where you can shop for supplies by printer. www.Inkjetmall.com. Click here to go to the Piezoflush link for the Epson 4900.
Epson has taken away some of the needed functionality to consumers to fix their own printers. I think way too many printers have heads prematurely replaced by Epson when a clog appears. Try this first.
You will need the Service program and the service manual, both of which you need to purchase and download, and a windows computer. You need to purchase the refillable cartridges as Piezoflush from Ink Jet Mall, and load the cartridges with the same. Trying to replace just one cartridge with Piezoflush and running regular cleaning attempts won't do it. I shied away from power cleanings as the documentation notes that repeated attempts can actually fry the head. So what do you do? Get the cartridges for the side with the clogs (or for both sides). You can do an initial fill on each side with the service program. Load the Piezoflush by an initial fill, and you can then see if your clog is fixed. The initial fill opens the nozzles to flush the ink and Piezoflush through the head. There is no issue of frying the head, as it is pumping a volume of ink and fluid through the head. It takes this program to really move the ink, rather than trying to use the head to clear the clog. You can print a nozzle check with Piezoflush, as it has a red color to it, and you can see if the nozzle is corrected. Take the Piezoflush cartridges out, reinstall the ink cartridges, and then run the initial fill again. Be sure to have an extra maintenance tank or two, as you are pushing a good volume of fluid into the same. It will not operate if the maintenance tank is full.
A practice tip. Be sure to remove the small plug (orange on the Ink Jet Mall cartridges) before loading the Piezoflush. If you don't remove the plug, it is likely you will get an air gap, and it will show as a clog. You will then need to re-run the initial fill. When you remove the cartridges, put the plug back in. I keep mine with the Piezoflush in the cartridge, sealed in a zip lock bag, in a box.

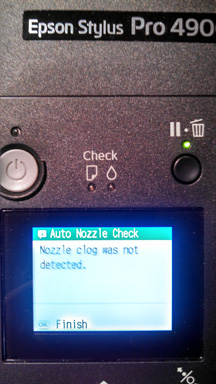
Once back up to speed, run some prints. I ran a test print that I got that has each color as a separate image on one page, which helps push ink through the nozzles. I also found that running a test print for monitors is a good way of regularly exercising your printer. Save the file and run it every day, or every other day, when you don't have a large print job. Exercise is the best medicine for this printer.
Please note that I am not associated with Ink Jet Mall, or receive any compensation from it. I am just a very happy customer who is printing again with an Epson 4900, and no longer the owner of a large paperweight. As always, your experiences may vary, and I am not responsible for any damage or issues that you might have with this product or your cleaning attempts. I hope this works for you.